Localizing our applications is more critical than we think. We usually stick with English as the primary language. Only 4.9% of the world’s 7.8 billion inhabitants speak English. Most of the people aren’t native English speakers. In the grand scheme of things, only 360 million people speak English as their first language.
SwiftUI gives us great and easy-to-use options to translate our applications into multiple languages. We might all be familiar with the Localizable.strings file where we put all the translations. I’m not going into how to create this for your projects.
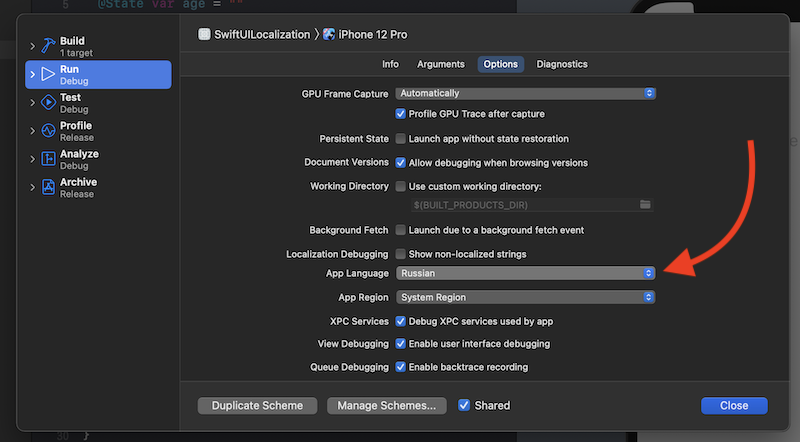
In addition, Xcode has the option to change build settings and change the default language without changing the system language itself.

In this article, we will discuss how to translate our SwiftUI apps by checking out built-in features. We will also see how to translate dynamically changing text.
Text approach
Almost all SwiftUI building blocks like Text, Button, TextField, and more come with initializers using localization behind the scenes.
For instance, let’s say we create a Text view with the title Name. We can add that to the Localizable.strings file and it would be translated without us doing anything. If the translation isn’t provided, it will fall back to the specified default title. We can say that SwiftUI takes care of translating our apps without us doing extra work.
Let’s dig in a bit deeper and check out the Text initializer.
init(_ key: LocalizedStringKey, tableName: String? = nil, bundle: Bundle? = nil, comment: StaticString? = nil)
We can see that the first parameter is LocalizedStringKey. Let’s explore it.
What is LocalizedStringKey?
The LocalizedStringKey is the magic that powers all the translations in our SwiftUI apps. What it does is looks up in the Localizable.strings file and checks if there is a translation with this key. It conforms to ExpressibleByStringLiteral and that’s why we can use it in our SwiftUI view initializers.
Another way of using LocalizedStringKey is when a translation is passed into the view. Let’s say we have a greetings view that takes in a greeting text as a parameter. In such a case, we need to create a parameter that has type LocalizedStringKey. When constructing this, we pass in not the String value but initialized LocalizedStringKey by using the LocalizedStringKey(_ value: String) initializer. In this case, it isn’t treated as just text, but a key from the translations strings file.
String interpolation
Now we know how static translations work, but how does it work with dynamically created texts? For instance, we have a text view that would show a greeting with a user-provided name. It would be Hello, Mary!, but Mary would be substituted with an entry from the text field. To translate this kind of text, we should use string interpolation.
In the example above, we should add in the Localizable.strings file entry Hello, %@! and the %@ would be a String parameter we pass in when creating the LocalizedStringKey like this:
Text("Hello, \(name)!")
Behind the scenes, it is using the String formatting that can format numbers, dates, currency, and more, taking into consideration your user’s locale. In this blog post, we are not going to dig deeper into that topic.
TL;DR
Only 4.9% of all people on the planet speak English as their first language. This means that we have to translate our apps to reach a wider audience and make them more accessible.
SwiftUI has a great set of built-in features to facilitate translations. Most of the view elements can be translated by adding translations to the Localizable.strings file.
With dynamic text, we should use the string interpolation and format it accordingly, either passed in the parameter is a text, number, or date. And SwiftUI will format that in the user's defined locale.