This time, we will look at a couple of ways to show a text label inside a circle using SwiftUI. We will dig deeper into three different ways using the ZStack view, .background and .overlay modifiers. In the end, as a small bonus, we will check out how to present a text label over a circle using the .clipShape modifier.
Our end goal is something like this:
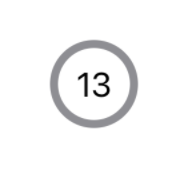
Layout out with ZStack
ZStack in SwiftUI is a unique view that shows all its children on top of each other. It works similarly to z-index in CSS. So let's try to show a Circle view and then the Text view on top. To not allow the Circle to fill the whole screen, we need to set a constant view width and height.
ZStack {
  Circle()
    .stroke(circleColor, lineWidth: 4)

  Text("13")
}
.frame(width: 40, height: 40)
Practicing the .background modifier
Now let's see how to use the .background modifier. Sadly Apple has not provided us with any documentation on how to use it, so we need to understand it ourselves the hard way. We can check out the source code and try to understand what is this view modifier doing.
func background<Background>(_ background: Background, alignment: Alignment = .center) -> some View where Background : View
By applying this modifier, we need to pass in a View and optionally specify the alignment in both axes. Let's set how can we use it for our Text field. This time we are not going to check out the alignment parameter. We want to show a circle as a background for the Text field.
Text("13")
  .background(
    Circle()
      .stroke(circleColor, lineWidth: 4)
      .padding(6)
  )
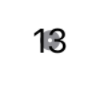
The outcome is not exactly what we wanted. To improve it, we need some space between the text and the circle to look a bit better.
To have a nice gap between the number and the circle, we could use the .padding() modifier. Now the text and the circle have some room to breathe between them.
Text("13")
  .padding()
  .background(
    Circle()
      .stroke(circleColor, lineWidth: 4)
      .padding(6)
  )
Untangling the overlay modifier
This time Apple hasn't provided documentation explanation again. Let's read the source code. It is relatively straight forward and similar to .background modifier.
func overlay<Overlay>(_ overlay: Overlay, alignment: Alignment = .center) -> some View where Overlay : View
It places the view on top of it, not under. We should not forget about the .padding() modifier to have a gap between the number and the circle. Using the previous example and changing background to overlay we have the same outcome.
Text("13")
  .padding()
  .overlay(
    Circle()
      .stroke(circleColor, lineWidth: 4)
      .padding(6)
  )
Although it looks identical, it works differently. This approach comes in handy if we would like to show an interactable view on top. Let's say we would like to present a tappable button on top. I wouldn't specifically advise doing so, but it explains the idea.
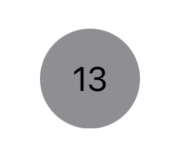
Bonus: Clipping as Shape
As a bonus tip, let's check out how we can use the .clipShape modifier to show a text field inside the circle filled with a color. The .clipShape modifier clips the view to a specific shape that we should pass as a parameter. For that, we can use a couple of shapes provided by Apple like circles, capsules, rectangles, and more. Or we can draw a shape ourselves with the help of the Path outline. Custom shapes we are leaving out of the scope of this blog post.
Text("13")
  .padding()
  .background(circleColor)
  .clipShape(Circle())
TL;DR
With SwiftUI achieving the same thing visually can be done in various ways. Placing a circle around the text can be done either stacking all the views on top of them using ZStack. Another approach is using .background or .overlay modifier.